Wednesday, July 17, 2019

Better Curves for the T&K Railway


My O-gauge ceiling railway was originally designed for 27-inch radius curves simply because that was all the curvature my childhood’s Lionel 2034 locomotive and cars required. In time, though, I found it difficult to expand my rolling stock collection because everything on my wish list required O-31 curves or better. Fortunately, O-31 curves just fit the existing shelving built for the railway which allowed me to do nothing more than swap 0-27 curves and track with the corresponding O-31 version.

All was relatively well until Bill, one of my wife’s co-workers, after learning of the railway decided to loan me some nice locomotives & cars he had in storage because he now did not have access to a model railway. Unfortunately, some of his collection would only run on O-42 or better curves. Since a really cool Shay locomotive was one of those items, the decision was made to modify the T&K’s shelving to accommodate 0-72 radius curves since that curvature appears to be the largest in regular production.

Due to the amount of shelving which could not be aesthetically attached to the walls, four pieces of ¼-inch All Thread per curve was incorporated into the design. As before, the new design was drawn up in AutoCAD.


Last time, each of the four curve sections were individually cut out and shaped to final dimension in assembly line fashion. Since the whole operation could have gone a lot better, this time I decided to make a pattern out of 1/8-inch hardboard and use a template guide on the router to mill the four, 5/8-inch MDF shelving curves from the pattern.

There has never been a point in my woodworking career, up until now, to draw 5-foot and larger radii. Fortunately, a yardstick compass will work once the yardstick is swapped out for a really long piece of hardboard.


After completing all the construction lines, the new track itself was laid on the proposed template for a quick sanity check. We’re good.


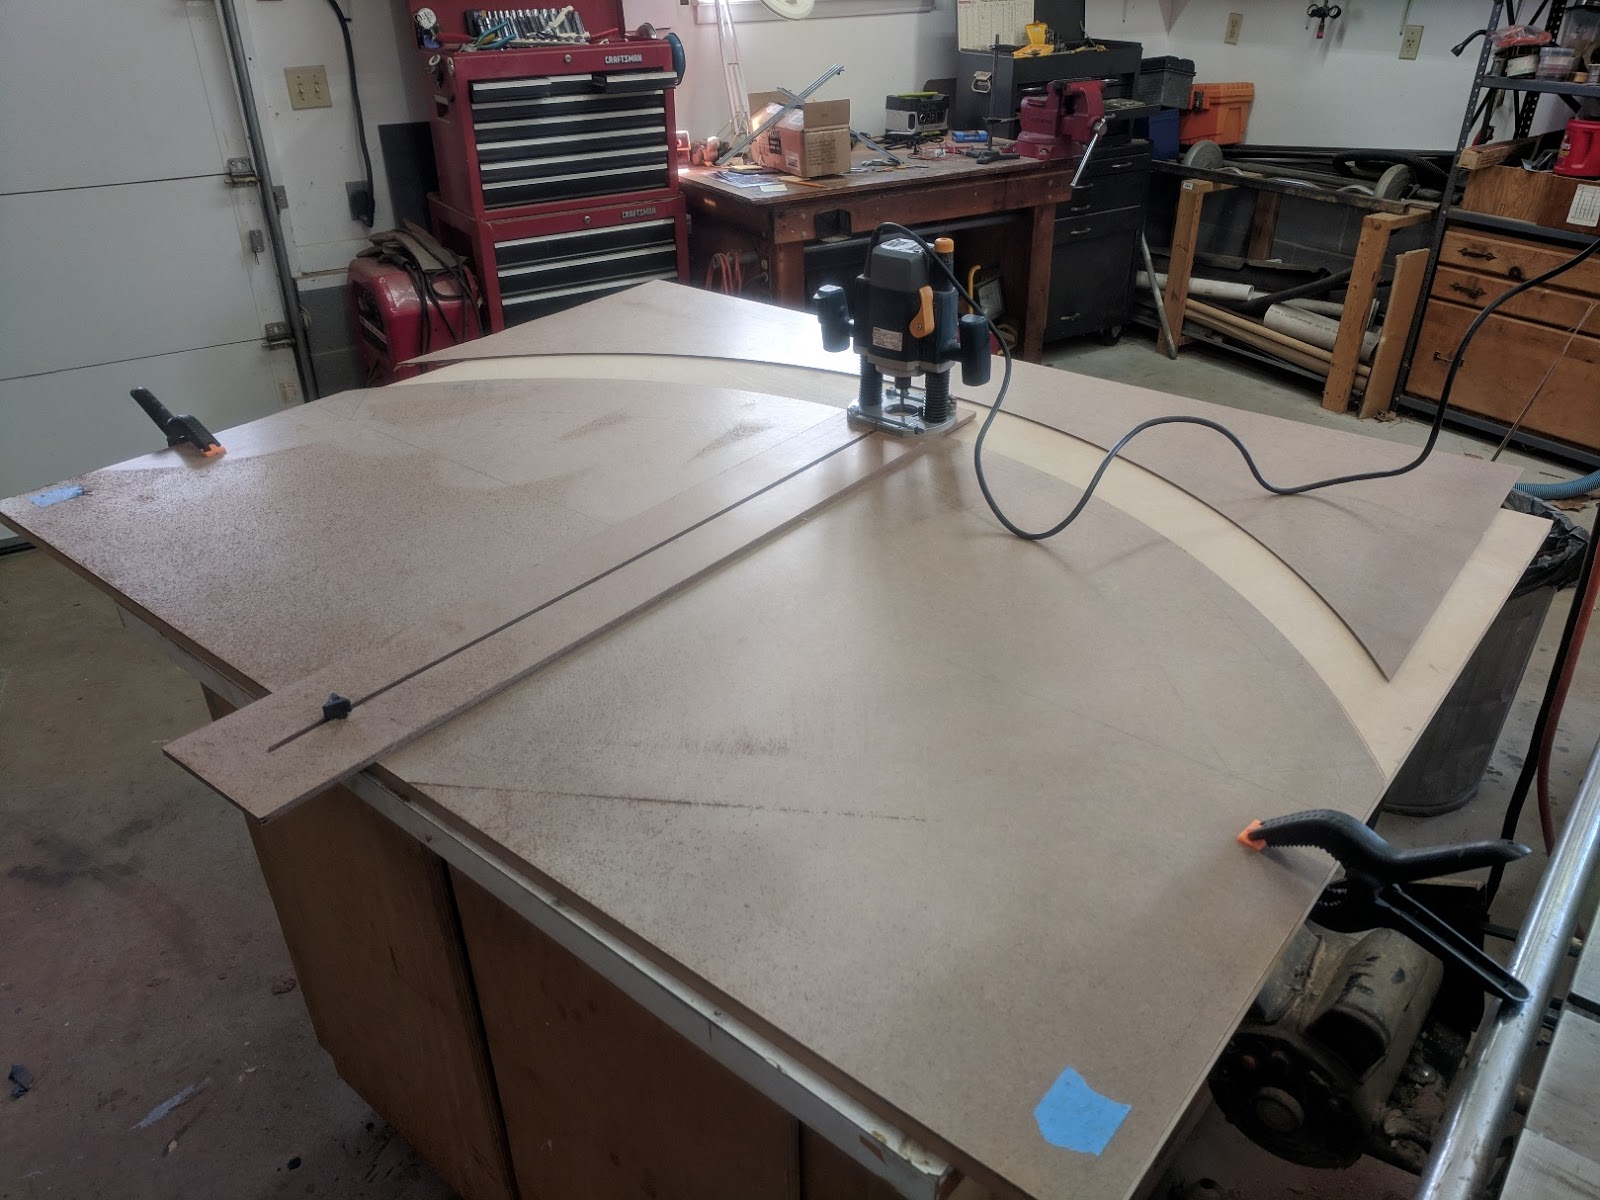
Unlike drawing large radii, I have routed large curves with a homemade jig. The jig was frustrating to use because each different radius required a new pivot point hole to be drilled in the jig. Getting past this stumbling block was a little more problematic because the longest, store-bought router compass I could find only did 24-inch curves. So two, long sections of 1/8-inch hardboard were glued together and milled to match the important dimensions of the store-bought version. Then the store-bought version’s hardware was remounted on the homemade version.


The result was a really easy to use, long router compass.


The tabletop drill press, mounted on a special stand & fitted with various Forstner bits, was used to provide radiusing on the inside corners.


After the master pattern was cut out and touched up with a drum sander attachment on the drill press it was used to rough out the four corner blanks.


The blanks were cut proud of the construction line with a jigsaw.


Then the ends were squared off with the radial arm saw.


With compass routing complete, the router was refitted with a template guide collar.


Then, with the template C-clamped onto each blank, the router was run around the perimeter to establish the final dimensions.


Next stop was the router table fitted with a round-over bit.


Soon afterward, the O-31 track & associated track wiring/lighting was removed for test fits. The new O-72 curves will be a big improvement over the ones originally designed for O-27.


Portions of the old O-27 shelving were cut out by jigsaw, small circular saw and hand saw. A 2X4 stand helped support the new curves for fit checks.


All empty biscuit slots and holes were then filled with wood putty. After fit checks, the new curve sections were returned to the shop for pocket holes.


Since I elected to leave the track wiring and LED lighting in place during the upgrade, it was taped off while the new curves were installed, caulked, primed, and painted.


My little ¼-inch right angle adapter has paid for itself countless times with tasks like drilling pilot holes in tight places.


I was very happy with how it all turned out:


Now to see what else Bill has!


.

Monday, July 15, 2019

Atwood RV Range for Parts?

.

My 1967 Airstream still has its original Magic Chef oven which we use at least once on every camping trip.  It has been amazingly reliable with repairs usually consisting of realigning something that vibrated out of place.  But one day I know a No-Longer-Available part will have to be replaced.  A new oven might be necessary.

The immediate problem is that no one makes an RV oven anymore – they only make ranges.  While a household wall oven would probably work, it will require 120 VAC for the electronics which may not be available depending on what type of camping going on.

Adapting modern-day RV oven parts to my half-century old oven seemed to be a reasonable avenue to investigate.  The issue here is that I have never used a modern-day, RV, gas oven to understand the differences between then-and-now operation (the Airstream’s oven has what is essentially a two-pilot light system[1] whereas modern ovens only have one).  It would be nice to play with a modern one to compare differences.

As much as we enjoy using our oven on camping trips I read that others do not apparently preferring a microwave instead.  So I was not surprised to see an RV range and hood for sale at a yard sale the other weekend.  Although it was noticeably smaller than my Magic Chef, it looked like a good “leaner” oven if the price was right.  It had obviously not been used much, and the yard-seller said it worked when removed.  Fortunately for me he was happy to mark it down to $20.

While hooking the gas up I noticed it was made by Atwood Wedgewood in 2005.


In what was no surprise, the three cook-top burners lit without incident; even the piezeo-electric sparker, a modern day feature to me, worked.  After a short line purge, the oven lit too.

While the oven was pre-heating, research on the range showed this model is still in production and sold new for around $500.  It was sold as a 17” range and has a big brother, 24” version.  Each uses the same thermostat and burner.

The Atwood’s burner is made of sheet aluminum alloy and has much less heating capacity & lower latent heat retention than the Magic Chef’s much larger cast-iron burner.


The broiler area was certainly no frills compared to my antique oven.  But, in reading camping forums, I noticed few people even know how to brown food in a gas oven.

The thermostat was found to be wildly out of calibration with no provision for adjustment.  But after bumping the temperature up and adding some stones to stabilize the heat, the oven produced a decent pan of cornbread.


The Totino’s cheese pizza cooked later came out surprisingly bad.  The lower rack position was used instead of the other, higher one which resulted in a “highly browned” bottom and uncooked top.  The top had to be broiled to make sure the cheese was melted.


It was now starting to dawn on me why some RVers did not use their ovens: the 17” version is just too small for some routine cooking tasks.  Unlike the Magic Chef, a half sheet pan will not fit.  Quarter sheet or smaller pans only.  Even with a few cooking stones, heat control is poor.  The mass of the cast iron burner in the Magic Chef coupled with the Robertshaw thermostat is tough to beat.

If push came to shove, the thermostat could be adapted but it would be a lot of work because its design made it integral to the range’s gas distribution bar.  Adapting the thermostat to flared pipe fittings would not be fun.

But keeping the limitations in mind it has been fun using the range for overflow cooking.  In fact, I made Granny Smith apple pie filling from scratch just to see how it do in the Atwood.


It turned out amazingly well and was a hit with everyone.


Cooking the pie out in my shop ended being good in an unexpected way – Per direction the glass pan was placed directly on the rack.  When it unexpectedly boiled over the syrup dripped on the metal plate dispersing the burner’s heat.  Smoke ensued in very short order and continued until a drip pan could be located/installed.

All-in-all, not counting entertainment value, a lot was learned for $20.  For now I think the range will be mounted on a stand and kept intact for overflow cooking in the summer.


Note [1]
My Overlander's '67 Magic Chef operates differently than modern ovens. Lighting the pilot light does not involve pushing & holding the knob - I just turn the knob to pilot, wait for the gas to run through, and light it.

The heat from that warms up a thermocouple hooked to the thermostat. When the thermostat calls for heat and the thermocouple is warm enough, it supplies gas to a secondary pilot immediately beside the primary pilot. This larger pilot light warms a different thermocouple hooked to a separate gas valve. When that thermocouple is warm enough, the gas valve opens and supplies gas to the main burner.

On occasion, the secondary thermocouple vibrates out of position has to be re-aligned or the main burner never lights.