
The master plan for keeping my 1967 Airstream Overlander at our house has always included a roof over its head. The parking pad it sits on was sized to accommodate the standard-sized, 12’X28’ RV carport popular when the pad was poured over 10 years ago. I even had shallow footings dug prior to the pour for extra anchoring mass.
Over the following years the subject was occasionally pursued only to find no professionals interested in adapting an “off-the-shelf” carport to fit on the pad’s irregularly-sloped surface. One day I woke and decided it was just time to get it done even if it meant doing it myself. Not that that the task intimidated me - I was just surprised I could not throw too much money at something to get it done.
After locating a supplier, a deposit was placed on a 12’X30’X12’ (latest standard size) Eagle Carport. Around two weeks later a dually with a really nice flatbed trailer backed up with the new, unassembled Airstreamport.

Two guys got out and worked together like a well-oiled machine assembling the Overlander’s new roof on a relatively flat section of land & concrete.

Wedge anchors were used to hold the front half of the structure to concrete while rebar spikes took care of the part over dirt.

The guys finished up in about three hours. They did a super job, and I have zero complaints about either the building or their workmanship.

So although now the Airstream had a roof over its head, the tires were sitting on dirt, and the pad’s full hookups, which hook up to the back of the Airstream, were at the side.

Thought was given to relocating the hookups and pouring additional concrete. Parking would be greatly simplified. But I did not want a backyard full of concrete when the pad was poured, and the sentiment had not changed. The airstreamport would have to be relocated to the front of the pad once suitable supports were made.
After deciding to place a support under every stud that would not be on flat land, the studs’ locations were marked on a “storypole”. Of note, the locations varied greatly between both each other, and side-to-side.

After leveling the storypole, the studs’ locations were projected onto the concrete. Using a hardboard template a triad of holes were started with a small hammer drill.

A big hammer drill was used for the actual anchors since ½-inch diameter holes at least 2-3/4 inches deep were needed.

There was a delay in getting the ¼-inch steel plate sheared for the actual mounting plates. To keep the project going, hardboard mockup plates were made to locate the all-thread studs in the holes prior to anchoring.

The Internet appears to be comfortable with the use of anchoring adhesive when used according to the directions. There did not appear to be a brand preference. The Sika brand was chosen simply because it came with two nozzles.

As luck would have it, there was enough adhesive left to anchor my drill press to the shop floor. I am the only homeowner I know that has done this!

After allowing the adhesive to cure, the storypole was brought back out to determine the supports’ heights.

Fortunately, my metal cutoff saw had just been fitted with a new wheel. It was certainly needed for the 2-1/2 inch tube stock.

Between hardboard mounting plates & top tabs, and the real, metal supports, there was high confidence that the actual end-product was going to work as intended.

In time the mounting plates got sheared (thanks Kenny!). Drilling the ½-inch diameter holes went well with the drill press securely mounted to the floor.

One of the steel plates was then placed on an all-thread triad for a quick sanity check – all was well.

My Lincoln stick-welder is conveniently located right by both my toolbox and big door, and is ready to weld in seconds. But since I wanted this job to look good, it never moved and my buddy Heath MIG welded the supports for me. He did an outstanding job.

Rustoleum cold galvanizing spray paint was used as a top coat.

As expected, the supports bolted up beautifully.

The next step was to move the carport forward to its new digs. The easiest & fastest option would have been to invite a bunch of guys over for barbeque & beer. Afterwards we could all stagger over and brute force the thing in place. But since most of my friends are now middle-aged there was a good chance someone would get hurt. So I went with Plan B – a come-along winch.
In preparation, 2X4s were sized to act as tracks & track supports between each support.

After checking the weather forecast to make sure it was not projected to be windy, the existing anchor bolts were Sawzalled off and the rebar spikes crowbarred up.

After that it was simply a matter of slowly winching the Airstreamport forward to its new location.
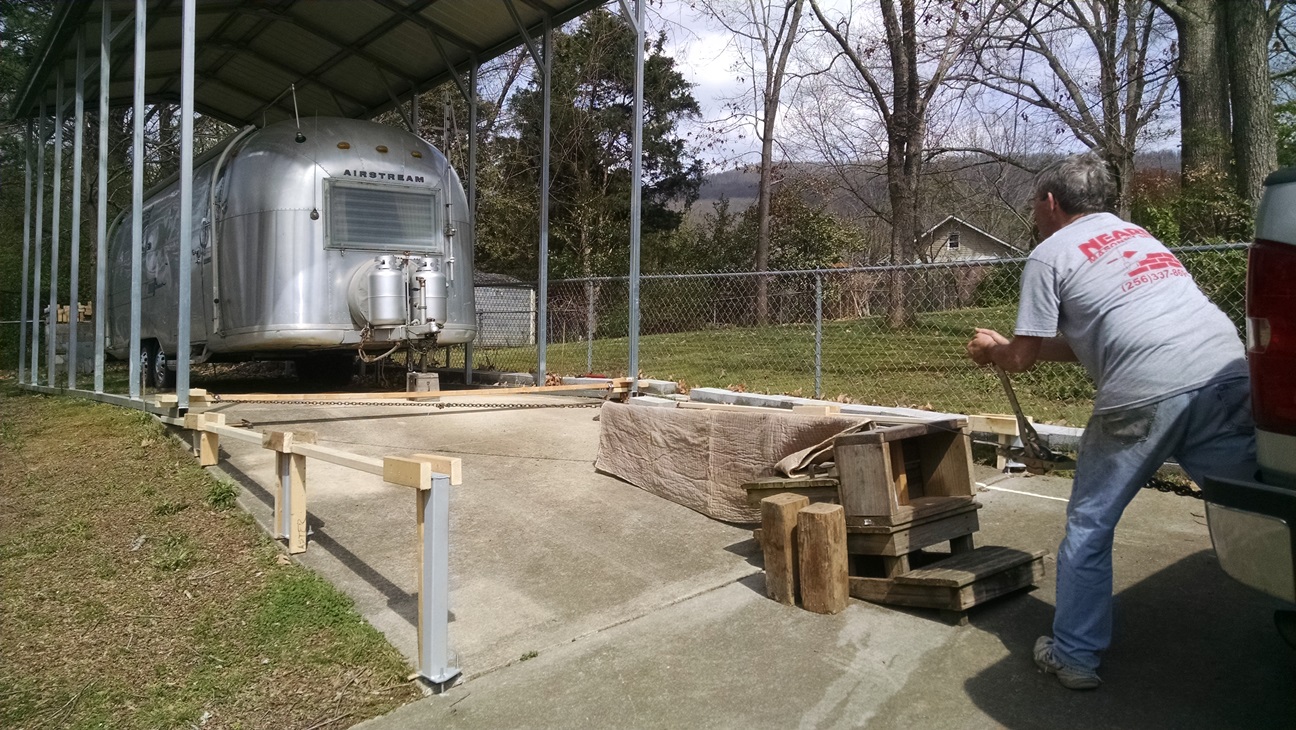
Although I did get my wife to come out and help me keep an eye out for potential problems during the move, I really didn’t want anyone else involved. But of course the neighbors had to come watch over the fence. Fortunately nothing went wrong, and the move was completed in less than ½ an hour.

After removing the wood cribbing, the airstreamport was then nut & bolted to the new supports, wedged anchored to the concrete or rebar-spiked to the ground as required. After a little touch-up painting on everything, I was pleased with how it turned out.

The Airstream’s tires had really gotten muddy during their brief time in yard. Pulling it forward for a wash-off gave me a better opportunity to sweep up construction debris.

One of the neighbors who watched the effort later independently volunteered that he thought the completed project turned out nicely. I have to agree.

Update:
My wife & I enjoy yardsales, and around four years ago I was fortunate to acquire two very nice, new, digital-ready outdoor TV antennas for a dollar (the entire tale is at this link). The best one was mounted on the house's chimney as part of our severe weather reactance plan should the cable go out. While the other antenna was offered to others, no one one took me up on the freebie.
Severe Weather Plan C is to retreat to the Overlander since it has its own antenna. But I noticed the new Airstreamport, with all its metal, might interfere with the signal. So the other antenna was mounted on a mast attached to the new structure. 14 channels - Nice!

.
Quite a project! Well done.
ReplyDeleteThanks, Steve!
DeleteI have Airstreamport envy....
ReplyDeleteThat's awesome!
ReplyDelete