In an effort to add realism to my O-gauge ceiling train loop, I recently completed both an Arduino-controlled, servo project to modulate the airflow to an eight-chime whistle made of one-inch PVC pipes, and a full-size crossing bell.
For the whistle assembly, various-length pipes were mounted in a piece of wood cut to match the inside diameter of a one-gallon windshield washer fluid container. Afterwards the assembly was painted with bronze-colored spray paint.

A lanyard attached to a retractable key chain modified to include a potentiometer is pulled to signal the Arduino. The length of pull modulates the amount of air delivered to the whistle manifold. Although my preference is for something prettier than what I built, the few store-bought encoders suitable for the effort were awfully expensive.

The Servo-controlled air valve took the most effort because I had to design and fabricate the valve itself.
Air power for the project is supplied by the motor from a vacuum cleaner found on the side of the road. A new enclosure had to be constructed because the original one had no way to connect the hose to the outlet side of the fan. Wood was chosen in an effort to dampen the noise of the device’s universal motor.

Although not obvious, the air valve is mounted inside the enclosure to modulate the amount of air leaving through the hose.
Even with the thick-walled box, the blower is still loud. As a consequence it was subsequently mounted to a floor joist underneath the house.
Although the setup worked exactly as expected, a problem popped up after only a minute or two of operation – sluggish or no valve operation. It seems the blower produces an unanticipated amount of heat while in operation. If the air valve is not allowing air to pass, this heat builds up in the enclosure. The plastic parts of the valve apparently did not like the excess heat. Fortunately, everything worked okay after being allowed to cool.
The solution ended up being easy – a blower control relay, mounted in a blue electrical box, was wired to one of the Arduino’s digital out ports. The code was modified to turn the relay on only when the lanyard is pulled.

Although my camera does not do the new project justice, here’s the 8 chime whistle compared to the train’s whistle.
My adaptation of a crossing bell, while technologically simpler than the whistle, had a higher parts count. The striker is one hammer out of a doorbell ringer. Oddly, the big box store sold me a doorbell ringer kit which involved the doorbell, two switches, and a 16 VAC transformer for just $13. The price struck me odd because they were selling the transformer by itself for $14. Go figure.
The control circuit is an NE555 timer hooked up to the transformer through an LM2596 adjustable power supply to a relay which actuates the modified doorbell ringer.
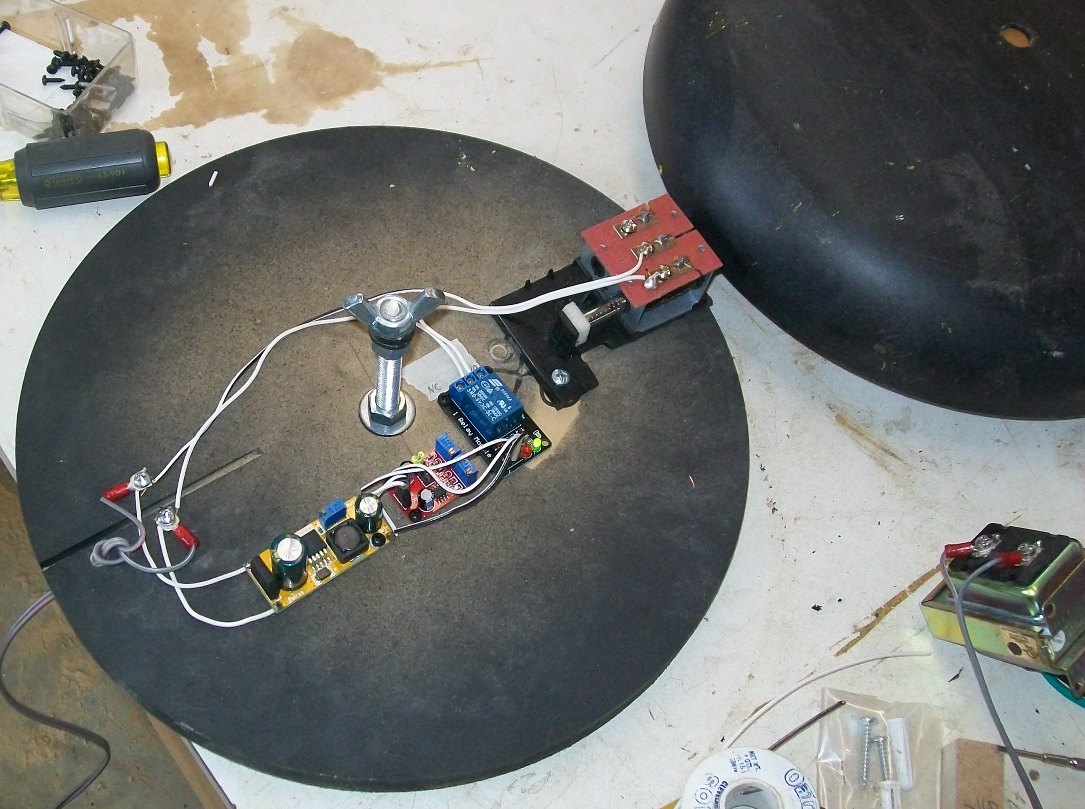
Here’s a checkout demo before the bell was installed: Crossing bell.
The assembly was mounted on the wall behind the door to the room. Even with a rubber-tipped hammer, it is still fairly loud.

For now I flip a toggle switch to turn on the bell. Although I have an IR detector in my toy-box which could be used as a traffic detector, the jury is still out on the best way to implement the bell.
I’ll keep you posted.

No comments:
Post a Comment